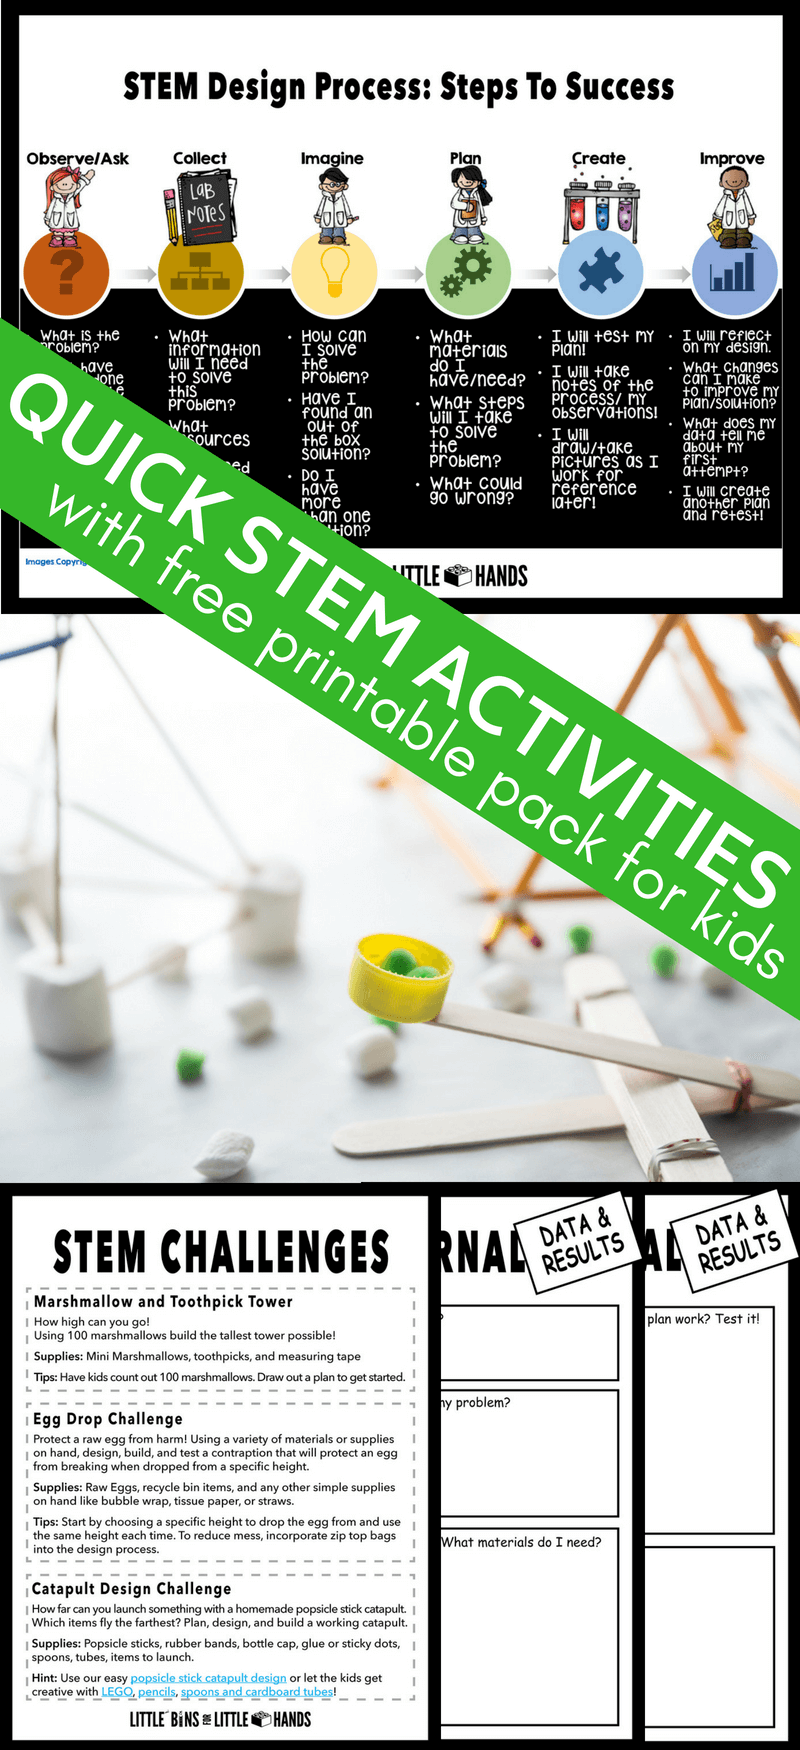
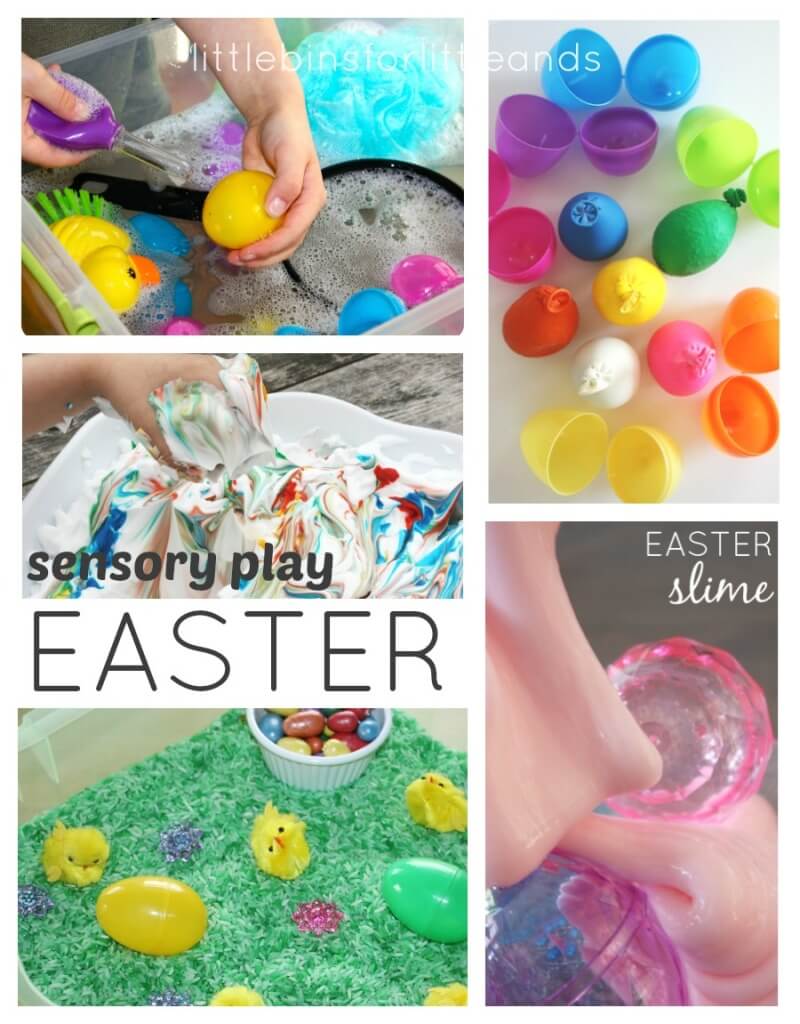
Overview of models of female berets

Berets are made in different shapes and sizes, volumes and differ in the width of the golfer. Due to the ability to change these parameters and adjust individually for each, there is this huge range.
It is also important to choose the material from which the beret will be made. Usually used for these purposes.
leather;- suede;
- drape;
- felt;
- fur;
- cotton;
- velveteen.
In general, almost any material is suitable for use and sewing berets. And its low cost makes this headdress especially popular with most ladies.
Beret can be chosen according to the season of the year, to the colors of the dress and according to your personal wishes. In any case, it will suit even the most demanding buyer and will not leave anyone indifferent. If you want to learn how to make berets with your own hands, we will help you, we will describe in detail all the nuances when sewing and tell you with the choice of model.
Female knit beret

Pattern of a female knitted beret
If you picked up a knitwear for a product and want to make light and elegant do-it-yourself takes, then we offer step-by-step instructions for a pattern.
Since we chose a knitted beret as the first example, we will first analyze the main points that will be similar in the pattern of absolutely any model:

- Take the size of the head. Measure the head circumference with a centimeter and calculate the diameter. The diameter can be found from the formula C = 2πr. Accordingly, the diameter is equal to the circumference divided by 3.14. These sizes are best remembered for further work, as they are needed for all types of hats.
- Then, on a graph paper, details of the future workpiece are drawn with a pencil. Bottom, stub and board in appropriate sizes.
- Transfer the drawing to previously prepared fabric.
IMPORTANT: trace the details on the fabric with a margin of about 1 cm (taking into account the cost of the seams).
- Cut out all the details, cut the fabric.
- Then sew the details using a sewing machine (manually you cannot make neat, inconspicuous and durable seams if there is not enough work experience in this).
Since the knit is very thin, it is necessary to make a lining. It is cut in the same way as the base according to the drawings. Then attach on a typewriter lining inside the beret. After all this, it is necessary to attach a peg, that is, the part that will be directly on the head.
IMPORTANT: when choosing a knitted fabric for sewing, work with it very carefully. She is the thinnest and most extensible of all, so working with her is quite difficult. Do not forget to iron the seams thoroughly with an iron after each stitching so that there are no ugly folds.
We sew a female knitted beret
In principle, there is nothing complicated in stitching the details together. For this, you do not even need special knowledge and skills. It is enough to recall schoolwork. A certain sequence is established during sewing and there is one important condition. After each seam, it is necessary to smooth it and check by standards, if the contour of the future product has not gone astray. It is better to regulate this at every stage of sewing, so that the end result can please you, and not upset you.
The sequence of sewing steps:
- Sew together parts of the bead, making it integral.
- Ironed along the seam with an iron.
- Then the bottom is sewn to the board, forming the basis.
- Stitch seams again.
- Finally, a stitch is sewn, while controlling the level of its landing on the head.
Female beret

Pattern of a female beret from a drape
The main points that we described above are also saved for embroidery of this model. But it should be said about the features. The biggest difficulty when working with the drap is its rigidity and density. This should be taken into account when cutting material and embroidering components. Many women specifically use tools to soften the tissue or beat it.
Sewing a beret from a drape with your own hands

Baby beret

Baby Beret Pattern
For a pattern we buy pink fur or any fabric, depending on what season we are preparing the headgear for. Take measurements from your head and draw the appropriate blanks first on paper, and then on the material from which you will be sewing. Cut the fabric according to the corresponding markings. Now you can start stitching.
IMPORTANT: the head of the child is much smaller than the adult, this must be taken into account when preparing the details of the cap. Do not make the side and side large. Otherwise, they will look ugly on the little and neat girl’s head.
We sew a children's take with their own hands

Tips from an experienced seamstress

Here are some of them:
- When working with drap, treat it with steam, so the material will soften and become more malleable.
- When choosing this material you need stronger needles and thicker threads.
- Beret must be decorated with decor, without it there will be a feeling of emptiness.
- Do all seams only on a typewriter. Hand seam can greatly distort the shape.
- Always consider that you need to take fabric with a margin on the seams.
- You must know in advance how much fabric will be needed for sewing and buy it in a store. You need to take with a margin for decor and damage to the material.
- If there are old things, then you can easily do them. Make takes from things that you have not worn for a long time. Breathe a second life into them.
I hope the article was interesting and useful for you. Needlework is something anyone can learn. The main thing is to show desire and desire in this direction.